Welcome to Vbond
Creating a "Floating" Cornice or Parapet Detail with ACP
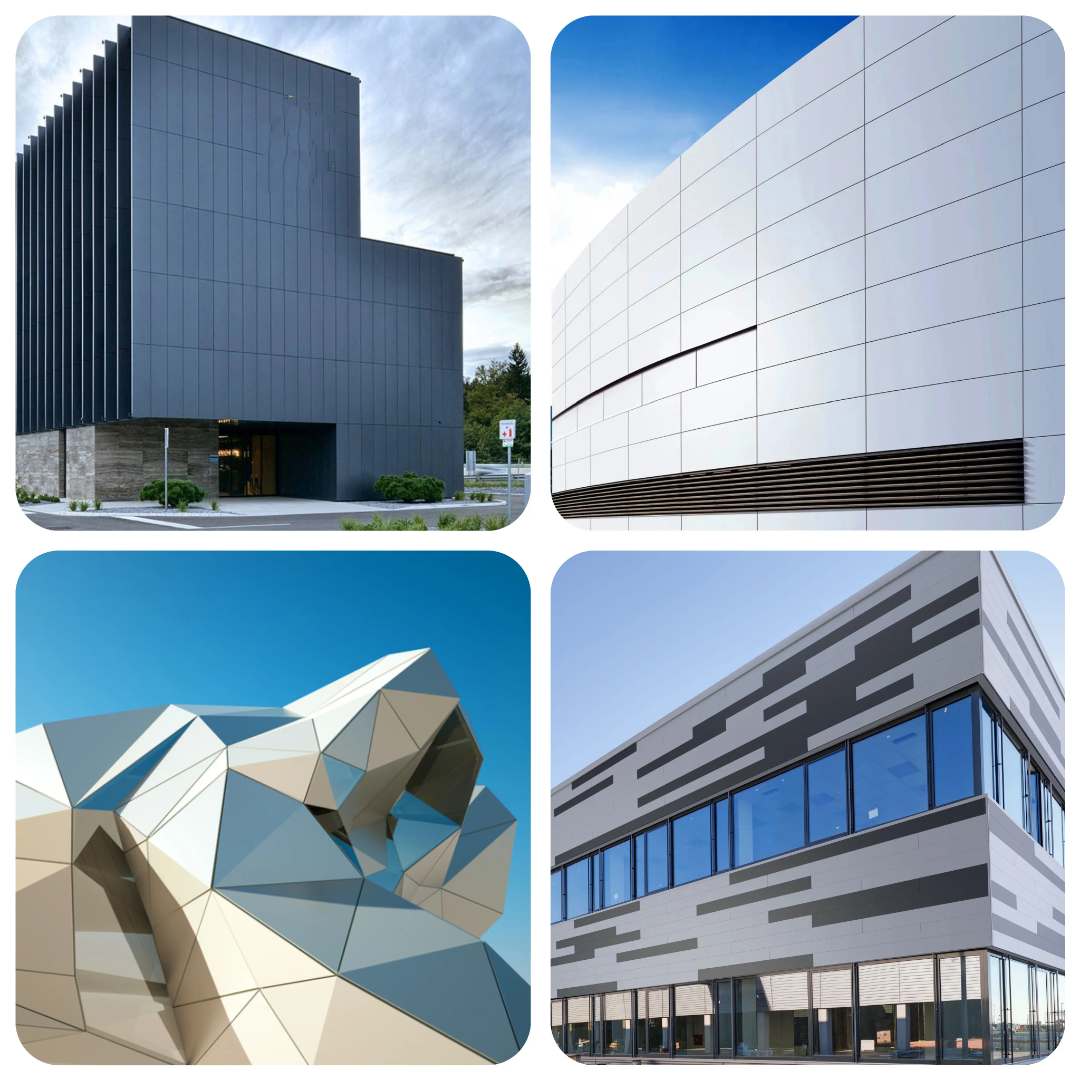
In architecture, the difference between a good building and a great one often lies in the details. The cornice—that transitional element where wall meets roof—has historically been a signature of architectural refinement. From classical dentil moldings to modernist reveals, the top of the building demands resolution.
Today, designers using Aluminium Composite Panels (ACP) have discovered a technique that elevates the cornice and parapet to new levels of sophistication: the "floating" detail. By creating a shadow gap between the top of the cladding and the roof edge, the cornice appears to hover weightlessly, defying gravity and adding a distinctively crisp, contemporary edge to the building silhouette.
This article provides a comprehensive technical guide to designing and constructing a floating cornice or parapet detail using ACP, ensuring your building tops achieve that coveted "lifted" appearance while maintaining weather integrity and structural soundness.
The Design Intent: Why "Floating" Works
The floating cornice achieves its visual magic through a simple principle: separation. By introducing a recessed shadow gap—typically 20mm to 100mm deep—between the top of the vertical ACP cladding and the horizontal parapet coping or roof edge, the eye reads the upper element as distinct and separate. This creates:
- Visual lightness: The building appears to have a crisp, thin edge rather than a heavy termination
- Sculptural clarity: The shadow line emphasizes the building's geometry
- Contemporary precision: The detail signals careful design attention
- Compositional interest: The building top gains depth and layering
As noted by architectural metalwork specialists, "shadow gap details create a crisp, clean look by adding depth and a precise line between building elements".
Material Selection for Floating Details
Not all ACP is equally suited to floating cornice applications. The specific demands of this detail—exposed edges, cantilevered elements, and prominent visibility—require careful material specification.
Panel Thickness
For cornice and parapet applications, panel thickness affects both appearance and structural performance:
- 4mm panels are standard for most facade applications, providing adequate rigidity for flat surfaces
- 5mm or 6mm panels may be specified for larger cantilevered elements or where extra stiffness is required
- Thicker panels reduce oil-canning and maintain flatness across wider spans
Core Type
Given the prominent location and potential fire exposure at the roof level:
- Fire-retardant (FR) cores are strongly recommended for cornice and parapet applications, particularly on buildings over 18 meters in height
- FR cores meet Class A flame spread ratings under ASTM E84 standards
- Mineral-filled cores offer the highest level of non-combustibility for critical applications
Finish Durability
Cornices and parapets receive maximum sun exposure and weather impact:
- PVDF (Kynar 500) coatings are essential for color stability and resistance to chalking
- High-quality polyester may be acceptable in sheltered locations, but it offers shorter longevity
- Matching reveals: If the shadow gap is formed by a painted aluminum reveal, ensure a color match between the ACP and reveal material
Anatomy of a Floating Cornice Detail
A successful floating cornice consists of several integrated components working together.
Key Elements
Component | Function | Material Considerations |
Vertical ACP Cladding | Primary facade surface, terminating below the roof edge | FR core, PVDF finish |
Shadow Gap/Reveal | Primary facade surface, terminating below the roof edge | FR core, PVDF finish |
Parapet Coping | Caps the parapet wall, sheds water | ACP-clad metal, pre-finished metal |
Substructure | Supports all elements, transfers loads | Aluminum framing, galvanized steel |
Flashing/Weatherproofing | Prevents water ingress at critical junctions | Membrane, sealants, counter-flashing |
Dimensional Considerations
The depth and proportion of the shadow gap significantly affect the visual outcome:
- Shallow gaps (20-40mm): Subtle shadow line, suitable for low-rise or intimate viewing distances
- Medium gaps (40-60mm): Distinct separation, works well for most commercial applications
- Deep gaps (60-100mm): Dramatic floating effect, ideal for prominent buildings and longer viewing distances
The width of the gap must also accommodate:
- Thermal movement of both ACP and substructure
- Access for future maintenance if required
- Drainage of any incidental moisture
Structural Design Considerations
The floating appearance must be supported by robust structural engineering.
Load Paths
All loads—dead load of panels, wind suction, wind pressure, and potential snow or maintenance loads on copings—must transfer reliably to the building structure. Key considerations:
- Coping attachment: Horizontal parapet copings must resist wind uplift, which can be significant at roof edges
- Cantilevered elements: Any projection beyond the structural wall requires engineered support
- Thermal movement: Aluminum expands approximately 1.2mm per 3 meters per 10°C temperature change. The system must accommodate this movement without binding or stress
Substructure Systems
Several framing approaches support floating cornice details:
Continuous Rail System
- Extruded aluminum rails mounted vertically or horizontally
- Provides continuous support for panel edges
- Allows concealed fixing for a clean appearance
- Accommodates thermal movement through slotted connections
Bracket and Rail System
- Brackets attached to the structure at intervals
- Horizontal rails spanning between brackets
- More economical for larger areas
- Requires careful alignment for flatness
Custom Fabricated Supports
- For complex geometries or deep projections
- Engineered specifically for project conditions
- Higher cost but maximum design flexibility
Fabrication Precision: The Key to Seamless Results
The floating cornice detail exposes edges and joints to close visual inspection. Precision fabrication is essential.
CNC Cutting and Routing
Computer-controlled fabrication ensures:
- Consistent dimensions: Every panel cut exactly to specification
- Clean edges: No chipping or roughness on visible surfaces
- Precise reveals: Shadow gaps maintain consistent width
- Complex shapes: Curved or angled corners fabricated accurately
Edge Finishing
Visible panel edges in floating details require special attention:
- Machined edges can be left clean if the panel construction is consistent
- Painted edges may be specified where the raw aluminum core would be visible
- Edge sealing protects against moisture ingress and extends panel life
Quality Control
Reputable fabricators maintain strict tolerances:
- Panel dimensions: ±1.5mm typical
- Flatness: Meeting or exceeding industry standards
- Color consistency: Within the same batch, verified under standard lighting
Installation Best Practices
Field installation determines whether the design intent is realized.
Sequence
Proper installation sequence prevents damage and ensures alignment:
1. Substructure installation: Brackets and rails installed, aligned, and leveled
2. Weatherproofing: Membrane and flashings installed at the roof junction
3. Vertical panel installation: Starting from the corners and working outward
4. Reveal installation: Shadow gap components fixed, ensuring consistent depth
5. Coping installation: Horizontal elements completed, with proper overlap and drainage
6. Sealing: Joints and penetrations sealed with compatible materials
Alignment Techniques
Achieving perfect shadow gap consistency requires:
- Laser levels for vertical and horizontal alignment
- Spacer blocks during installation to maintain a consistent gap width
- Sequential checking at each stage before proceeding
Thermal Movement Accommodation
Floating details must move without binding:
- Slotted connections allow panels to expand and contract
- Expansion joints incorporated at intervals (typically 5-6 meters)
- Sliding joints within the shadow gap reveal the ability to accommodate differential movement
Weatherproofing the Floating Detail
The junction between vertical cladding and roof is among the most vulnerable points on any building. The floating detail, with its intentional gap, requires meticulous weatherproofing.
Principles
- Drainage over sealing: Design so water drains freely rather than relying solely on sealants
- Multiple lines of defense: Primary weather barrier behind the facade, secondary protection at joints
- Ventilation consideration: Balance weather protection with the need for cavity ventilation
Critical Details
At the Base of Shadow Gap
- Continuous flashing directs water outward
- Drip edge prevents water from tracking back to the wall
- Weep holes at intervals allow any trapped moisture to escape
At Panel Joints
- Sealant only where necessary
- Backer rod behind sealant for proper shape
- Compatible sealants (neutral-cure silicone for ACP)
At Corners
- Mitered panels for crisp outside corners
- Reinforced corner details to maintain geometry
- Sealant at corner joints with a tooled finish
Case Studies: Floating Cornice in Practice
Commercial Office Building, Urban Context
A five-story office building required a distinctive top detail without adding height beyond zoning restrictions. Designers specified a 75mm shadow gap between the top of charcoal-gray ACP cladding and a matching ACP-clad parapet coping. The deep shadow line gives the building a distinctive silhouette visible from the adjacent highway, while the consistent material palette maintains elegant simplicity.
Coastal Residential Project
A beachfront home needed a corrosion-resistant parapet detail that could withstand salt spray while appearing light and contemporary. Stainless steel substructure supported PVDF-coated ACP panels with a 50mm shadow gap. All fixings were 316-grade stainless steel, and edges were sealed with marine-grade sealant. Three years post-installation, the floating detail remains crisp with no corrosion visible.
Educational Facility Renovation
An outdated 1970s school building received a contemporary facelift using ACP cladding. The new parapet detail incorporated a 40mm shadow gap with a colored aluminum reveal in the school's signature blue. The reveal color provides a subtle branding element while the floating detail modernizes the building's appearance.
Common Mistakes and How to Avoid Them
Even experienced installers can encounter challenges with floating details.
Mistake | Consequence | Prevention |
Inadequate thermal movement allowance | Buckling, sealant failure, panel stress | Calculate movement, design slotted connections, and install expansion joints |
Insufficient drainage | Water trapping, corrosion, staining | Include weeps, slope horizontal surfaces, and avoid dams |
Poor alignment of the reveal | Visible taper, uneven shadow line | Use laser levels, install spacers, and verify alignment before final fixing |
Incompatible materials | Galvanic corrosion, sealant failure | Match material families, use isolation where dissimilar metals meet |
Ignoring wind loads at the roof edge | Panel failure, safety hazard | Engineer for worst-case wind uplift, verify fixings |
Visible fixings | Compromised aesthetic | Specify concealed fixing systems, plan fixing locations before fabrication |
Floating cornice details require periodic inspection and maintenance:
- Annual inspection: Check sealants, fixings, and panel condition
- Cleaning: Remove salt, pollutants, and biological growth
- Sealant renewal: Replace degraded sealants before water penetration occurs
- Drainage verification: Ensure weeps and drainage paths remain clear
Conclusion: The Detail That Defines the Building
The floating cornice or parapet detail represents architectural ambition realized through technical precision. By creating a deliberate separation between vertical cladding and roof edge, designers achieve a lightness and clarity that distinguishes exceptional buildings from merely adequate ones.
Success depends on:
- Thoughtful design that proportions the shadow gap to the building's scale and context
- Material selection appropriate to the exposure and structural demands
- Precision fabrication that delivers clean edges and consistent dimensions
- Meticulous installation that realizes the design intent in the field
- Robust weatherproofing that protects the building while maintaining the aesthetic