Welcome to Vbond
Step-by-Step Guide to Installing Aluminum Composite Panel (ACP)
Introduction
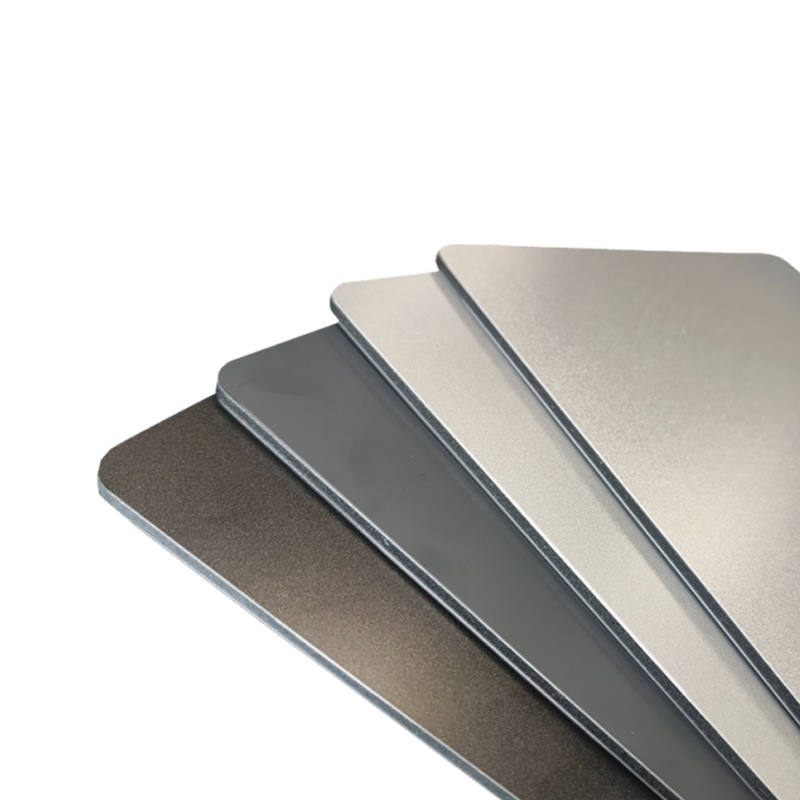
Aluminum Composite Panel (ACP) has become a cornerstone of modern architectural design, offering durability, aesthetic flexibility, and energy efficiency. However, their performance heavily depends on precise installation. This comprehensive guide walks you through the professional installation process, ensuring structural integrity, weather resistance, and long-term performance.
Phase 1: Pre-Installation Planning & Preparation
Step 1: Design Verification & Material Inspection
- Review architectural drawings and engineer-approved shop drawings
- Verify panel specifications (thickness, coating, fire rating)
- Check all materials for compliance with ASTM standards
- Confirm batch numbers to ensure color consistency (ΔE < 2.0)
Step 2: Site Assessment & Substrate Preparation
- Conduct laser scanning of substrate surfaces
- Verify flatness tolerance: ≤3mm per 2m span
- Check structural integrity and load-bearing capacity
- Install vapor barrier if required (per ASTM E1745)
- Apply corrosion-resistant primers on metal substrates
Step 3: Material Handling Protocol
- Store panels vertically on A-frames at 15-25°C
- Maintain humidity below 60% RH
- Keep protective film intact until installation
- Use vacuum lifters for panels larger than 2m²
Phase 2: Framework Installation
Step 4: Structural Framing System
1. Layout Marking
- Transfer grid lines from drawings using laser levels
- Mark anchor points with ≤1.5mm tolerance
2. Primary Structure Installation
- Install vertical mullions first, typically aluminum 6063-T5/T6
- Verify plumb alignment: ≤1mm per 3m height
- Secure with stainless steel anchors at specified centers
3. Secondary Framework
- Install horizontal rails with calculated expansion gaps
- Use slotted connections for thermal movement
- Apply anti-corrosion treatments to cut sections
4. Quality Check
- Verify frame squareness: diagonal variance ≤2mm
- Check fastener torque values (typically 25-30 Nm)
- Confirm expansion joint dimensions
Phase 3: Panel Fabrication & Preparation
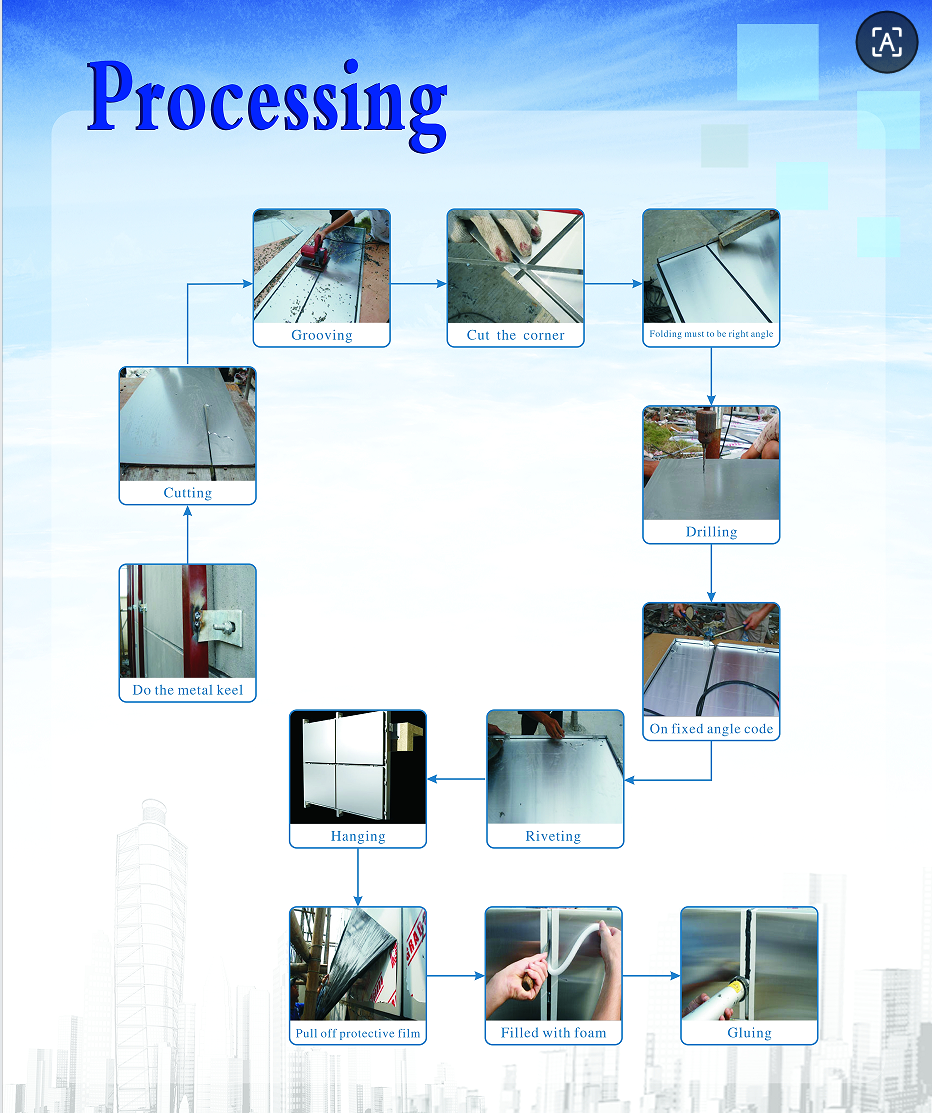
Step 5: Panel Cutting & Machining
1. Measurement & Marking
- Measure each opening individually (avoid assumption of uniformity)
- Add 3-5mm clearance per side for expansion
- Mark cut lines using non-permanent markers
2. Precision Cutting
- Use carbide-tipped blades or CNC routers
- Maintain cutting speed: 2000-3000 RPM
- Support panels evenly to prevent vibration
3. Edge Treatment
- Deburr all cut edges immediately
- Apply two-coat edge sealer (primer + polyurethane)
- Allow 24-hour curing at 20°C minimum
4. Feature Creation
- Form returns using brake presses (minimum radius = 2× panel thickness)
- Create drainage channels in the bottom rails
- Machine fastener slots for thermal movement
Phase 4: Panel Installation
Step 6: Dry Fitting & Adjustment
- Test fit each panel without fasteners
- Verify clearances: 3-5mm expansion gaps
- Check alignment with adjacent panels
- Mark final fastener locations
Step 7: Mechanical Fastening
1. Fastener Selection
- Use stainless steel (A2/A4 grade) or aluminum rivets/screws
- Select length to penetrate ≥10mm into the structure
- Include EPDM washers for water sealing
2. Installation Sequence
- Begin installation from the bottom upward
- Install corner panels first for reference
- Follow the modular grid pattern consistently
3. Fastening Technique
- Insert fasteners perpendicular to the panel surface
- Apply consistent torque (typically 15-20 Nm)
- Stop at "snug tight" – avoid over-compression
4. Special Conditions
- Around openings: increase fastener density by 25%
- At corners: use structural adhesive supplement
- On curved surfaces: reduce fastener spacing
Phase 5: Joint Treatment & Sealing
Step 8: Joint Preparation
- Clean surfaces with isopropyl alcohol
- Install closed-cell backer rods at 30% compression
- Apply bond breaker tape to joint backs
Step 9: Sealant Application
1. Material Selection
- Use neutral-cure silicone (ASTM C920, Class 25)
- Verify compatibility with panel coatings
- Color match to panel or use a contrasting design element
2. Application Technique
- Load sealant cartridges into calibrated guns
- Apply in continuous beads at a 45° angle
- Maintain constant speed for uniform profile
- Achieve hourglass cross-section (width: depth = 2:1)
3. Tooling & Finishing
- Tool joints within 10 minutes of application
- Use concave tools for a finished appearance
- Remove excess immediately with solvent wipes
Phase 6: Final Adjustments & Protection
Step 10: Alignment Verification
- Check panel flatness with 2m straightedge (≤2mm deviation)
- Verify joint uniformity with gauge pins
- Inspect and reveal dimensions throughout installation
Step 11: Protective Measures
- Remove protective film within 30 days of installation
- Clean surfaces with pH-neutral cleaners
- Apply protective coating if specified
- Install temporary guards at pedestrian levels
Step 12: Drainage Verification
- Test drainage paths with controlled water application
- Verify weep hole functionality
- Confirm no water accumulation in cavities
Phase 7: Quality Assurance & Documentation
Step 13: Performance Testing
1. Water Penetration Test (per AAMA 501.1)
- Apply water at 15% above design pressure
- Monitor for 15 minutes minimum
- Zero leakage requirement
2. Structural Performance Check
- Conduct dial gauge deflection measurements
- Verify ≤L/240 deflection under service loads
- Check fastener integrity with a torque audit
Step 14: Documentation & Handover
- Prepare as-built drawings with panel layout
- Document all deviations from the original design
- Provide maintenance manual with:
- Recommended cleaning procedures
- Inspection schedules
- Sealant replacement intervals
- Submit material warranties and test reports
Pro Tips for Professional Results
1. Environmental Considerations
- Install at 10-30°C for optimal material performance
- Avoid installation during precipitation or high winds (>50 km/h)
- Account for daily temperature variations in gap sizing
2. Tool Maintenance
- Clean cutting tools after every 50 linear meters
- Calibrate torque tools daily
- Replace sealant nozzles every 4 hours
3. Safety Protocols
- Use fall protection for installations above 1.8m
- Implement dust extraction during cutting
- Provide eye protection during all fabrication
4. Common Pitfalls to Avoid
- Never stack panels horizontally during installation
- Don't use penetrating fasteners near panel edges (<20mm)
- Avoid silicone contamination before sealing
- Never install damaged or deformed panels
Conclusion
Professional aluminum composite panel (ACP) installation requires meticulous attention to every phase of the process. By following this step-by-step guide and adhering to manufacturer specifications and international standards, installers can ensure:
- Structural Integrity: Panels that withstand design wind loads and thermal movements
- Weather Resistance: A building envelope that prevents water infiltration
- Aesthetic Quality: Clean lines and consistent appearances
- Longevity: Systems that maintain performance for decades
Remember that the proper installation of aluminum composite panel (ACP) not only fulfills architectural vision but also protects building investments. When in doubt, consult with ACP manufacturers, structural engineers, and certified installation specialists to ensure optimal results.
Note: This guide outlines general principles for the installation of aluminum composite panels (ACPs). Always refer to project-specific drawings, manufacturer instructions, and local building codes for exact requirements.