Welcome to Vbond
How to Prevent Alucobond Blistering: A Complete Field Installation Guide
You have seen it before. A beautiful facade goes up. Everyone approves the work. Months later, blisters appear across the panel surface. The sleek finish looks damaged. The client demands answers.
Most blistering is preventable. It starts with the choices you make during installation. This guide covers the complete field installation process. You will learn how to handle, store, cut, fix, and seal Alucobond panels to prevent blistering. And you will know exactly what to check at every stage.
Part 1: Before Installation Starts
1.1 Inspect Panels on Delivery
Examine every panel when it arrives. Check the packaging for water stains or damage. Look for signs of moisture exposure. Document any damage with photographs.
What to check:
- Protective film is intact and undamaged
- No water stains on packaging
- No edge damage or delamination
- No surface scratches or dents
If you find damage, report it to the forwarding agent immediately. Do not accept damaged panels.
1.2 Store Panels Correctly
Poor storage creates problems before installation even starts. Moisture damage can begin at the storage yard.
Storage rules:
- Protect Alucobond pallets against rain, moisture penetration, and condensation
- Store panels flat, not standing vertically
- Only stack pallets of identical size
- Maximum 6 pallets stacked on top of each other
- Avoid storage exceeding 6 months
- Keep panels away from direct sunlight
Any panels exposed to moisture must be dried to avoid spots or corrosion. If you store panels incorrectly, you create blister problems before you even start cutting.
1.3 Choose a Quality Supplier
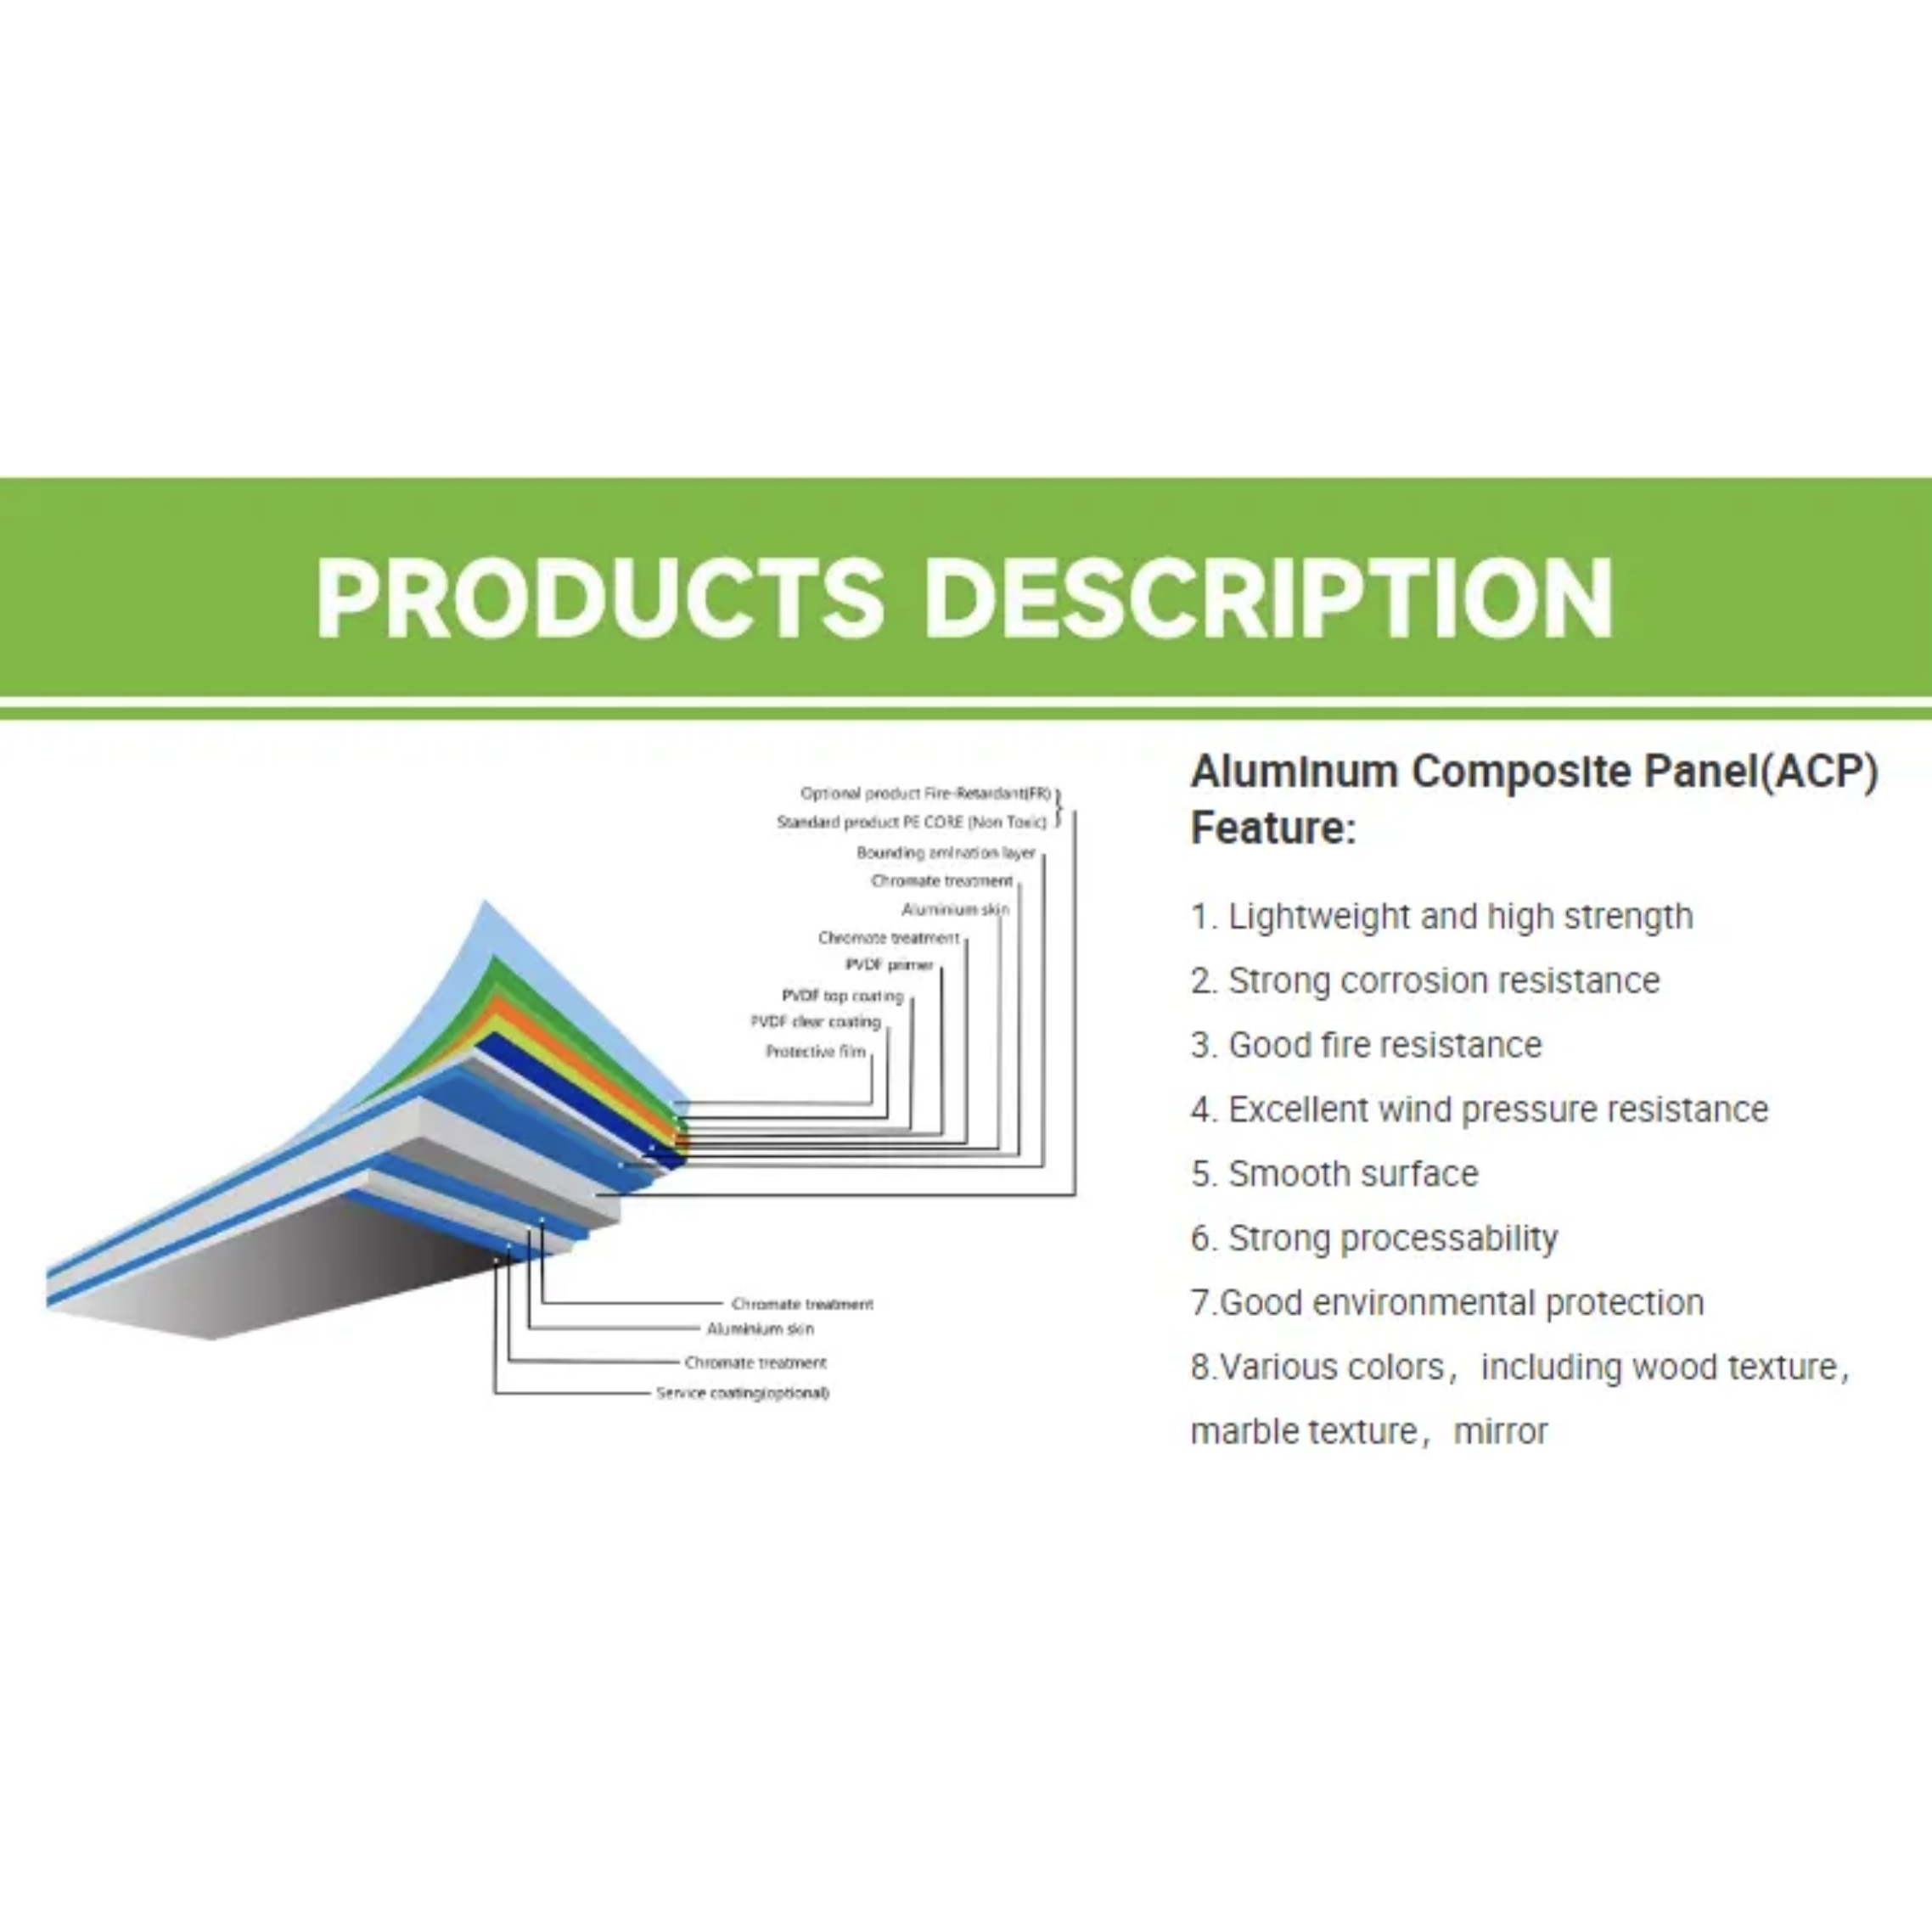
Not all Alucobond panels are manufactured with the same quality. A reputable Alucobond interior panel supplier uses virgin LDPE with stabilized additives and rigorous cleaning protocols. When evaluating a manufacturer of Alucobond, ask about their quality control documentation and adhesive systems.
A reliable wholesale supplier of Alucobond will provide technical documentation on storage, handling, and installation. A distributor of Alucobond panels should stand behind their material with clear warranty terms.
Part 2: Cutting and Grooving
2.1 Cut with Precision
The way you cut the panel affects its vulnerability to moisture. Different cutting methods create different edge conditions.
Best practices:
- Use sharp blades to minimize heat generation
- Avoid methods that melt the polyethylene core
- Clean cut edges immediately after cutting
Heat from dull blades melts the core material, creating a "smear" of plastic on the cut edge. This prevents the aluminum skins from seating flush and increases delamination risk.
2.2 Groove Correctly
When routing V-grooves for folding, precision matters.
Key requirements:
- Leave 0.3mm minimum residual thickness at the bottom of the groove
- Use a 3.2mm deep groove for a 4mm thick panel
- Apply even force when bending the edge
- Do not bend repeatedly—one smooth motion only
If you route too deep, the residual thickness drops below 0.3mm. The aluminum skin loses support. It cracks or blisters.
2.3 Seal Cut Edges Immediately
Every cut edge must be sealed before installation. This is the most critical prevention measure.
Why it matters:
Moisture wicks into unsealed cut edges through capillary action. Once moisture enters the core, it cannot escape. The moisture attacks the adhesive bond. The aluminum skin separates from the core. Blisters form.
What to use:
High-quality, flexible polyurethane sealants compatible with aluminum and the panel core. Apply sealant immediately after cutting. Do not wait. Do not leave exposed edges overnight.
Part 3: Fastening and Fixing
3.1 Understand Thermal Expansion
Alucobond expands and contracts with temperature changes. The linear thermal expansion coefficient is 2.4 mm per meter for every 100°C temperature change.
A 4-meter panel in a 50°C temperature swing expands by nearly 5 mm (4.8 mm to be exact). If you do not allow for this movement, the panel cannot expand. Stress builds. The adhesive bond fails. Blisters form.
3.2 Use Oversized Holes
To avoid jamming, the hole in the panel must be large enough to allow for expansion.
The rule:
With the shaft of the rivet fitting closely to the edge of the hole, the attachment head must cover over 1 mm of the area surrounding the hole.
If the hole is too small, the panel cannot move. The stress transfers to the fasteners. The panel buckles or blisters.
3.3 Use the Right Fasteners
For outdoor use, use stainless steel fascia screws with sealing washers that have been approved for construction.
Installation tips:
- Remove the protective foil only from the screwing area before screwing
- Use multi-step drills or sleeves for centrically drilling holes
- Tighten screws with a torque wrench so the sealing washer sits on the panel without exerting pressure
Critical warning:
Do not over-tighten fasteners. If the sealing washer deforms or the rubber seal protrudes beyond the washer, the panel can no longer expand. The panel is locked in place. It will buckle or blister.
3.4 Allow Expansion Gaps
Leave adequate gaps between panels. A typical allowance is 5–10 mm between panels.
For panel runs exceeding 6 meters, physical expansion joints are required. Without them, the panels cannot move. They buckle. They blister. They fail.
Part 4: Sealant and Joints
4.1 Seal Joints Properly
Improper sealing allows water ingress. In coastal regions or high rainfall areas, this is critical. Water infiltration causes staining, internal wall damage, and corrosion of the substructure.
Best practices:
- Use weatherproof sealants at all joints
- Pay attention to detailing around openings, joints, and transitions
- Ensure sealant is compatible with aluminum surfaces
4.2 Use Proper Backer Rods
Foam backer rods must be installed correctly. Use closed-cell polyethylene rods with a diameter 120% of the joint width. Use blunt tools for installation. Do not puncture or damage the rod. Do not use wet rods.
If the rod is damaged, air escapes and gets trapped under the sealant. Blisters form.
Part 5: Protective Film
5.1 Keep Film on During Fabrication
The protective film is designed to remain on the panel during handling and bending. As ALUCOBOND processing guidelines specify: "To prevent damage caused to the panel surface, the protective peel-off foil must not be removed during bending".
5.2 Remove Film Promptly After Installation
To avoid adhesive residue on the surface caused by UV radiation, remove the protective foil as soon as possible after installation.
What NOT to do:
- Do not write on the protective film with markers or felt tips
- Do not put adhesive tapes or stickers on the film
- Do not leave film on exterior panels exposed to direct sunlight
Solvents and softeners in markers can penetrate the film and damage the painted surface.
Part 6: Quality Checks During Installation
6.1 Check the Substructure
The subframe provides the structural base for mounting Alucobond panels.
What to verify:
- Vertical and horizontal members are installed according to the layout
- Uniform spacing is maintained (generally 600 mm center-to-center)
- The sub-frame is leveled and securely anchored
- All structural members are strong enough to support the panels
A weak or uneven subframe leads to panel misalignment, visible facade distortions, and long-term structural stress.
6.2 Inspect Panels During Installation
Check every panel before and during installation.
What to look for:
- No scratches, dents, or blisters
- Clean, consistent folded edges
- Proper alignment with adjacent panels
- Correct expansion gaps (5–10 mm)
6.3 Test for Hollow Sounds
Tap each panel with the handle of a screwdriver. A solid panel produces a sharp, consistent sound. A panel with core defects or delamination produces a dull, hollow sound.
If you hear a hollow sound, investigate immediately. The panel may already have a void forming between the aluminum skin and the core.
The Complete Prevention Flowchart
Start
│
▼
Receive and inspect panels (check for damage, moisture)
│
▼
Store panels flat, dry, away from sunlight
│
▼
Cut panels with sharp blades (minimize heat)
│
▼
Seal all cut edges immediately with polyurethane sealant
│
▼
Route V-grooves (leave 0.3mm minimum residual thickness)
│
▼
Prepare substructure (level, secure, proper spacing)
│
▼
Drill oversized holes (allow for 2.4 mm/m/100°C expansion)
│
▼
Install with stainless steel fascia screws + sealing washers
│
├─── Tighten so the washer seals without deforming
│
▼
Leave expansion gaps (5-10 mm between panels)
│
▼
Seal joints with weatherproof sealant
│
▼
Install backer rods correctly (120% joint width, blunt tools)
│
▼
Remove protective film immediately after installation
│
▼
Inspect every panel (visual, tap test for hollow sounds)
│
▼
Done ───► Flawless facade with no blisters
The Prevention Checklist
Stage | What to Check | Pass/Fai |
Receiving | Packaging intact, no water stains | ☐ |
Storage | Panels flat, dry, away from sunlight | ☐ |
Cutting | Sharp blades, clean edges | ☐ |
Edge sealing | All cut edges sealed immediately | ☐ |
Grooving | Residual thickness 0.3mm minimum | ☐ |
Substructure | Level, secure, 600mm spacing | ☐ |
Hole size | Oversized for thermal expansion (1mm overlap) | ☐ |
Fasteners | Stainless steel with sealing washers | ☐ |
Tightening | Washer seals without deforming | ☐ |
Expansion gaps | 5-10 mm between panels | ☐ |
Joint sealing | Weatherproof sealant at all joints | ☐ |
Backer rods | 120% joint width, dry, undamaged | ☐ |
Protective film | Removed immediately after installation | ☐ |
Final inspection | Visual check, tap test | ☐ |
Caption: Complete blister prevention checklist for Alucobond field installation.
Alt text: Checklist table showing 14 inspection points across receiving, storage, cutting, sealing, grooving, substructure, fastening, and final inspection.
The Bottom Line
Blistering is preventable. It starts with proper handling and storage. It continues with correct cutting and edge sealing. It depends on proper fastening with oversized holes and correct torque. It finishes with prompt film removal and thorough inspection.
The physics is simple: Alucobond expands at 2.4 mm per meter for every 100°C temperature change. If you do not allow for that movement, stress builds. The adhesive bond fails. Blisters form.
Prevention is straightforward:
- Store panels correctly—flat, dry, away from sunlight
- Seal every cut edge immediately
- Use oversized holes (1 mm overlap minimum)
- Use stainless steel fasteners with sealing washers
- Tighten without deforming the washer
- Leave 5-10 mm expansion gaps
- Remove protective film immediately after installation
- Inspect every panel
A reliable Alucobond interior panel supplier provides the panels. Your installation process determines the quality. Get it right, and your facade stays flat for decades. Get it wrong, and the blisters appear within months.
The choice is yours.